API Tutorial
This tutorial shows you how to register an application and use the Yuvo Web API to create Yuvo company accounts and synchronize company-related information.
By using the Yuvo Web Site and API, you accept our standard Terms & Conditions.
About This Tutorial
Through the Yuvo Web API, authorized external applications can create and retrieve Yuvo content such as company and employee profiles.
Before creating Yuvo records for actual company already registered in your application you must obtain explicit authorization from the relevant company authority.
CAUTION: Unless created in redirection mode, Yuvo platform will automatically send notification email to company users created by your application through Yuvo API.
We will show you how to:
- Register an application with Yuvo,
- Get its Client ID and Secret,
- Get Client credentials access token
- Create record from a Web API endpoint.
Use Client Credentials Flow to create Company record and manage Company details like its profile and its employees.. This flow will directly get the access token which will be used in further API calls. This process requires a secret key, and for security is done through direct server-to-server communication.
Use Authorization Code Flow for getting access to existing customers in Yuvo platform. This flow first gets a code from the Yuvo OAuth Service, then exchanges that code for an access token. The code-to-token exchange requires a secret key, and for security is done through direct server-to-server communication.
You will be using Client Credentials Flow Below are the actions that can be done using "Client Credentials"
Whereas Authorization Code Flow should be used when you act on behalf of some user account. Below are the actions that can be done using "Authorization Code"
How to use Sandbox Mode?
Sandbox Mode should be used when you want to test the APIs. Usually the Company and Employee Records
created in production mode cannot be removed. By using Sandbox mode you can delete the company and
employee records that has been created for testing purpose.
Things to remember while using sandbox mode:
- If you dont have any sandbox companies, create one using "Sandbox Client credential" application.
- Sandbox applications will not have access to production data.
- You can clean up the test data, using the "delete" methods of "Sandbox Client credential" application. (Note: Production applications don't have permission to delete.)
Setting Up Your Account
To be able to use the Web API, the first thing you will need is a Yuvo Partner account. To get one, simply sign up here.
When you have a partner account, go to the My Applications page at the Yuvo Developer website and, if necessary, log in.
Registering Your Application
You can register your application, even before you have created it. Follow these steps to register an application:
- Go to the My Applications page at the Developer website.
- Click New application.
- Enter the name of your application (for example, “My Test Application”.)
- Select the authorization grant type.
- Select Sandbox if you want create an application for testing the APIs. Otherwise select Production.
Note: Records created in production cannot be deleted via API. Please use sandbox at initial development stage or if you want to use the API with test data, so that the records can be deleted later.
- Add any Redirect URIs (Only for "Authorization code" grant type) that the Yuvo OAuth service could call when
authentication process completes. You can enter multiple addresses, for example, one for
authentication on mobile devices, one for desktop machines.
Important: When you call the Yuvo OAuth service from your application, you will send a
redirect-uriin the call. Theredirect-uriis the address that the Yuvo OAuth service redirects to after authorization succeeds or fails. If you do not white-list that URI here, authorization will fail. Any URI you enter here must exactly match the value you later use in the calls to the Accounts Service, including upper/lowercase characters, terminating slashes, and so on.Note: If your
redirect_uripoints to a directory, include a trailing slash (/)—otherwise some browsers may have a problem handling the redirect. You do not need to add a trailing slash to your URI if it points to a file. You should also check that your server does not add or remove trailing slashes when handling the incoming redirect URI as that can also cause problems.For the purposes of this tutorial, add this URI to the Redirect URIs whitelist:
http://localhost:8888/callback
- Click Save to complete the registration of your application.
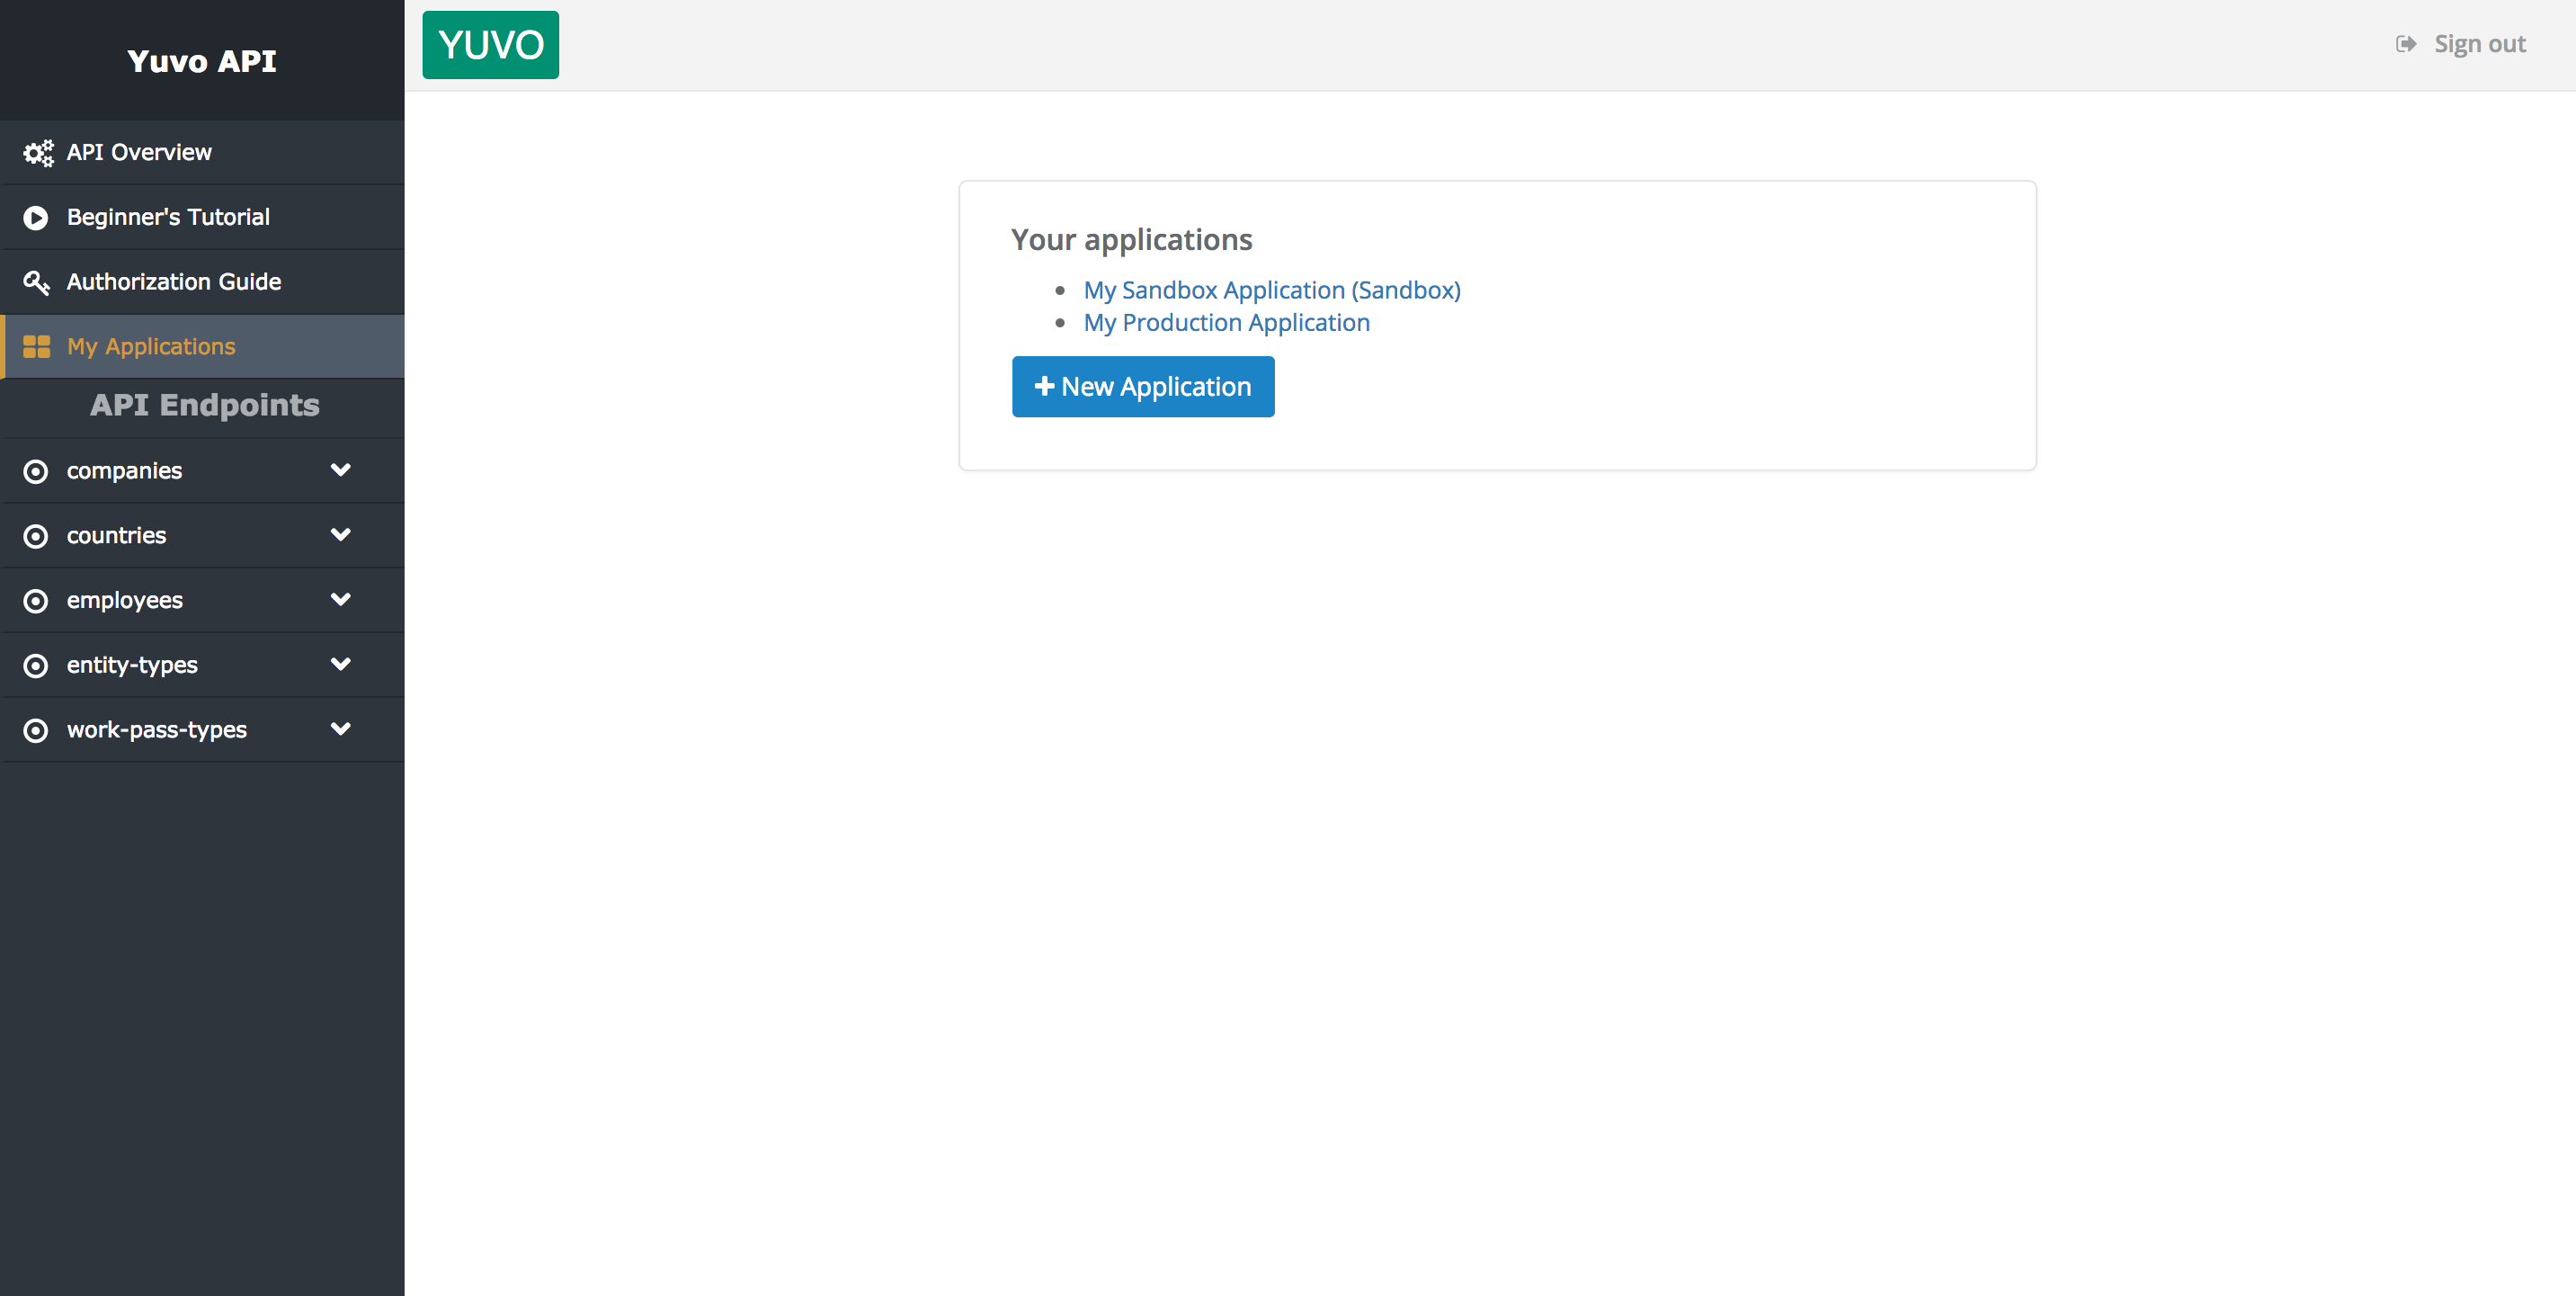
- Your application will now be shown, along with any other applications you have registered, in the
main list on the My Applications page:

Getting the Client ID and Secret Key
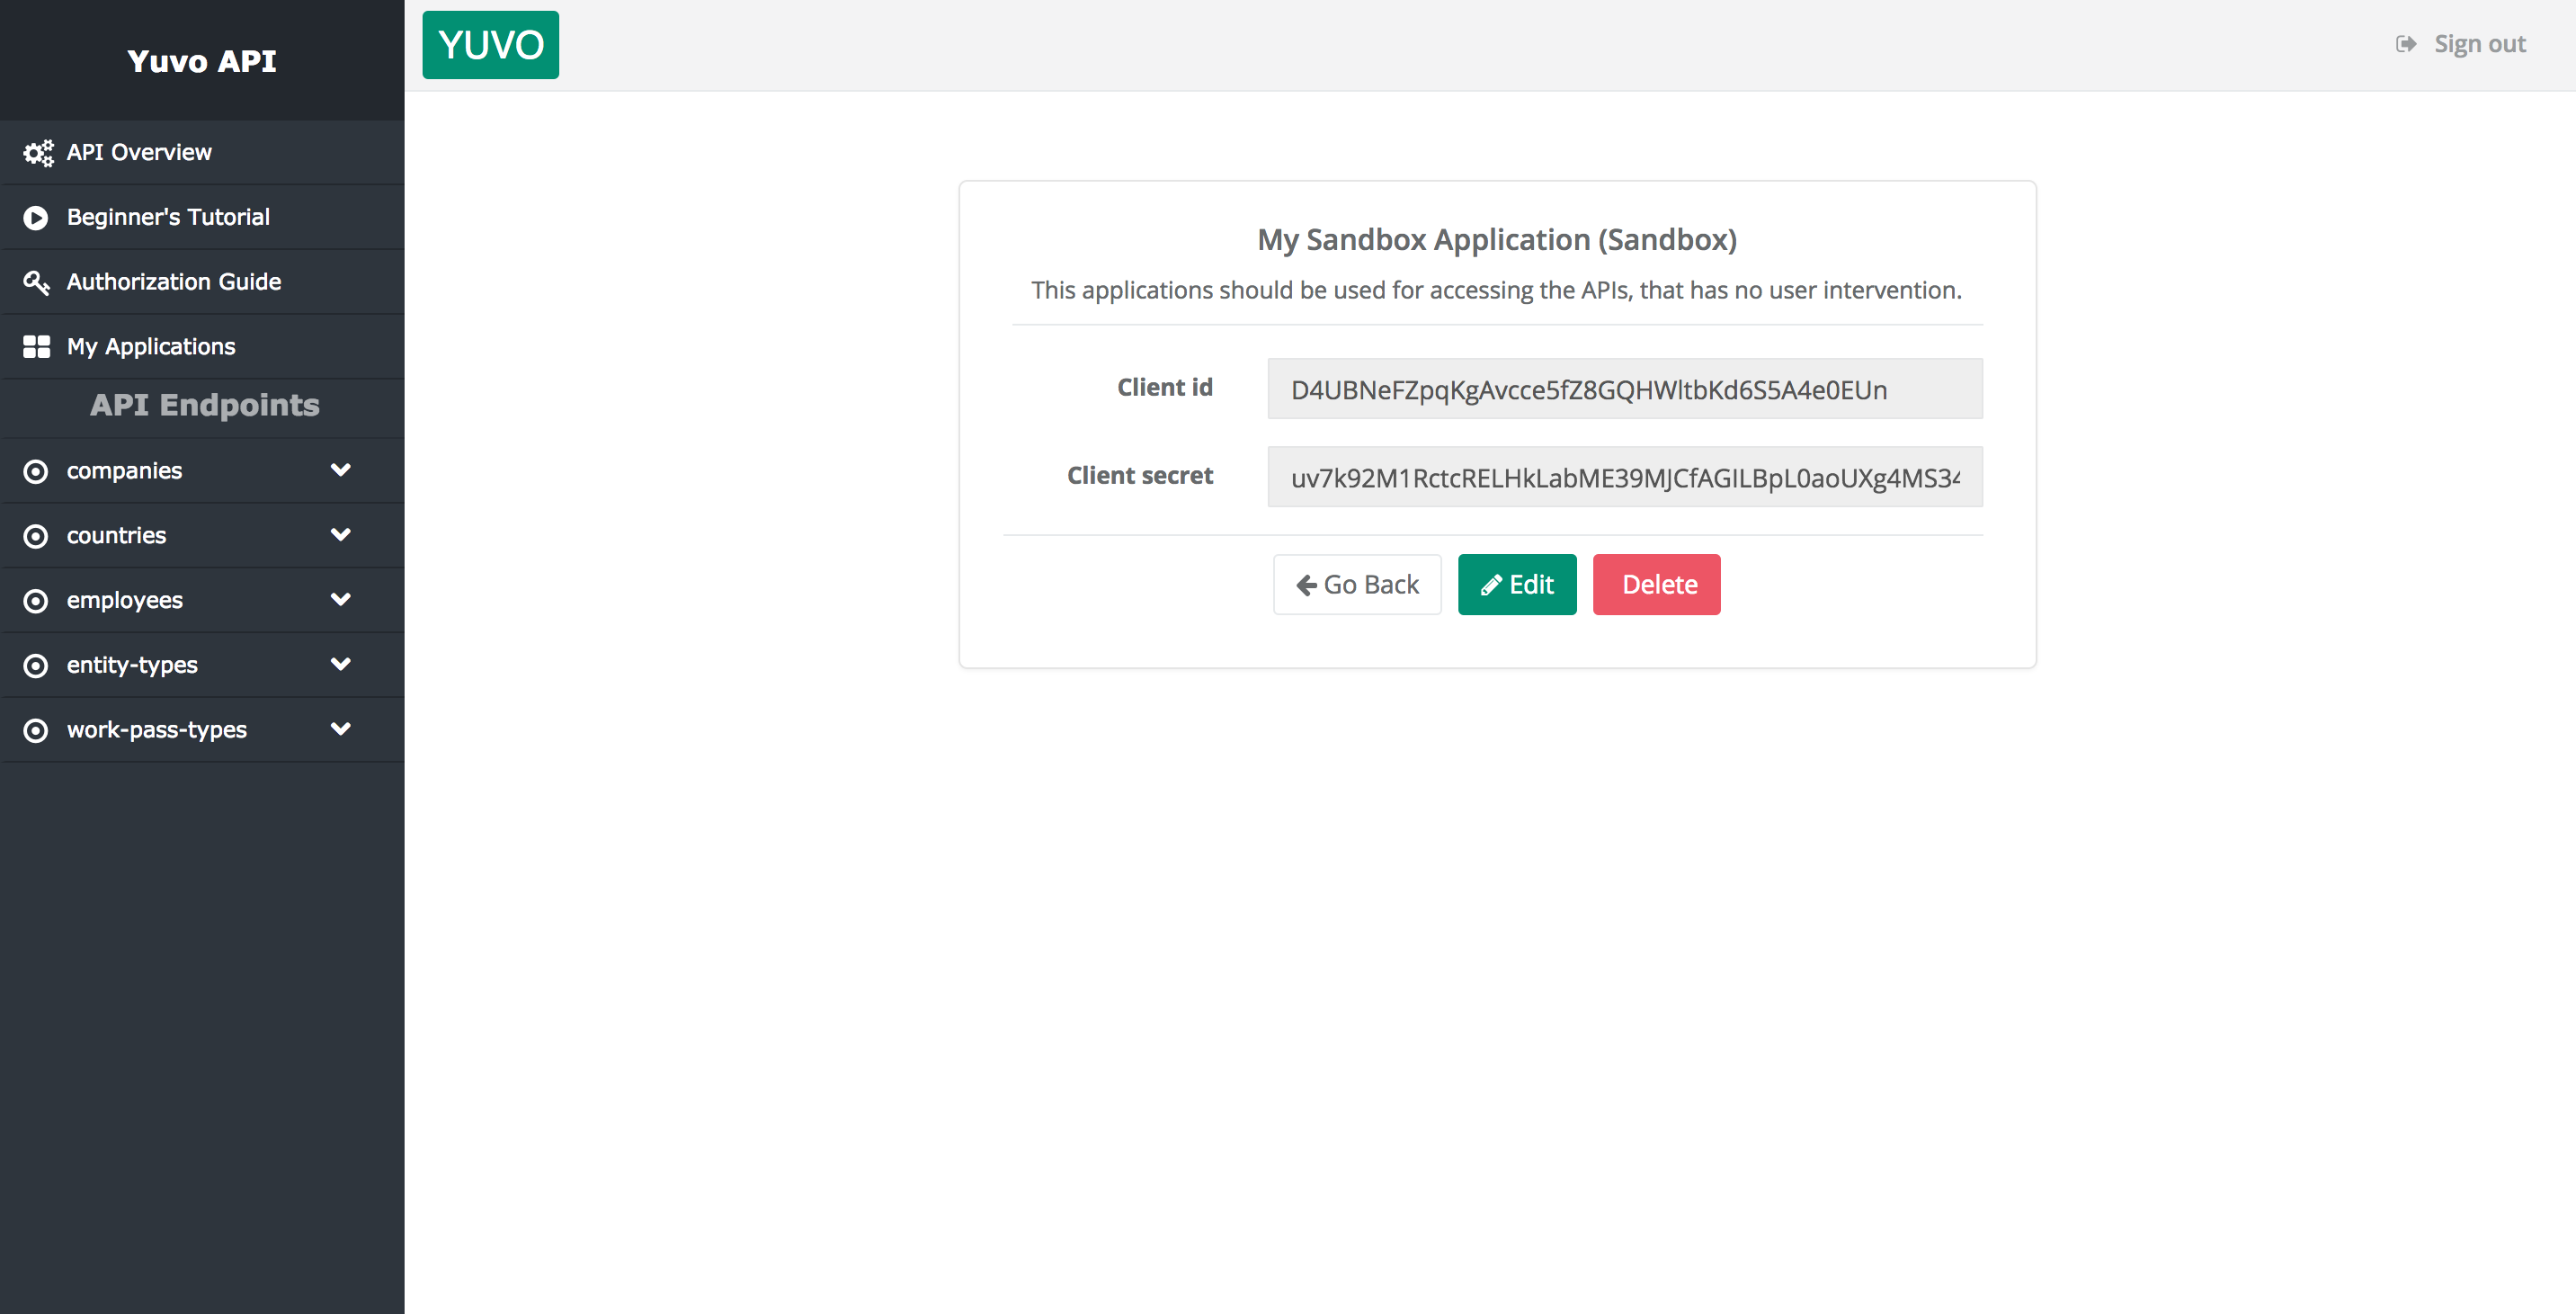
You can see the credentials in application’s details page:

- Client ID—the unique identifier for your application. It does not need to be stored securely and usually it does not need to be changed. (If for some reason you do need to change the client ID, you will need to delete your application from your account and register it again.)
- Client Secret—the key that you will need to pass in secure calls to the Yuvo OAuth
Accounts and Web API services.
Always store the client secret key securely; never reveal it publicly!
Interacting with the API directly from our documentation
Now that your application is registered, you can directly get an access token
and use it from our API documentation to experiment and get relevant code input and output samples.
-
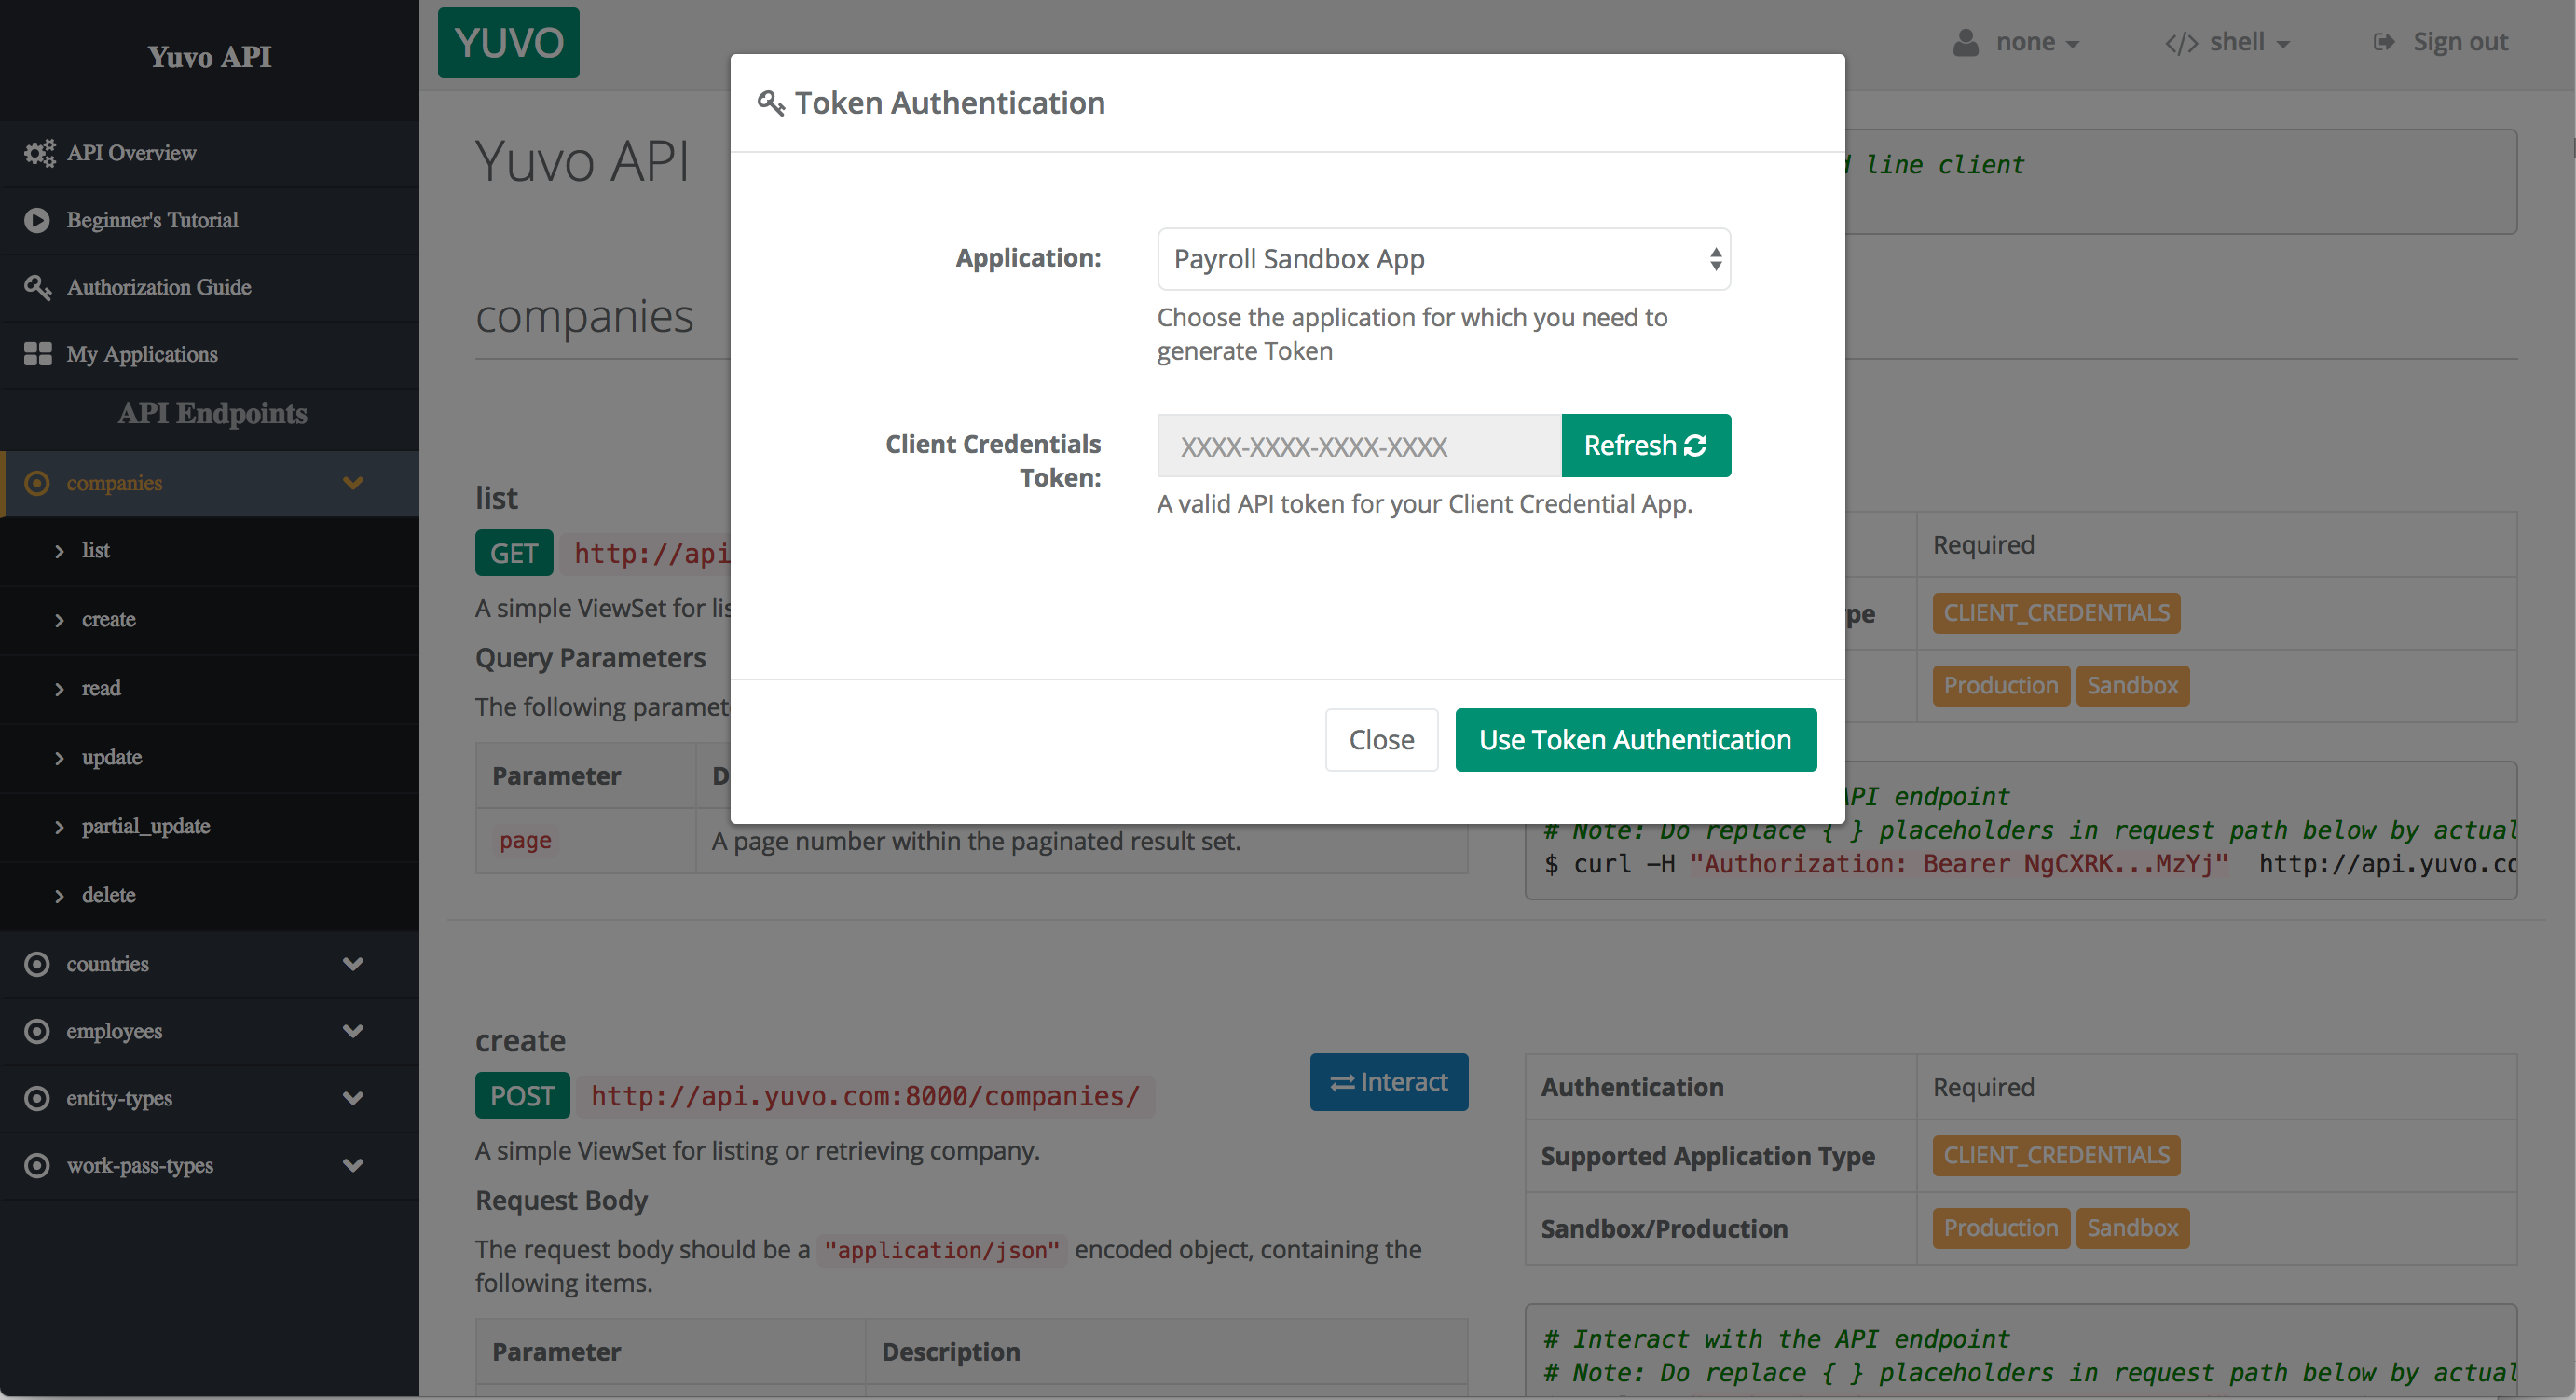
Go to API documentation then select token authentication method

-
Click on "refresh", then "Use Token Authentication".

-
You can switch the language used for instructions and code sample in the top menu bar

-
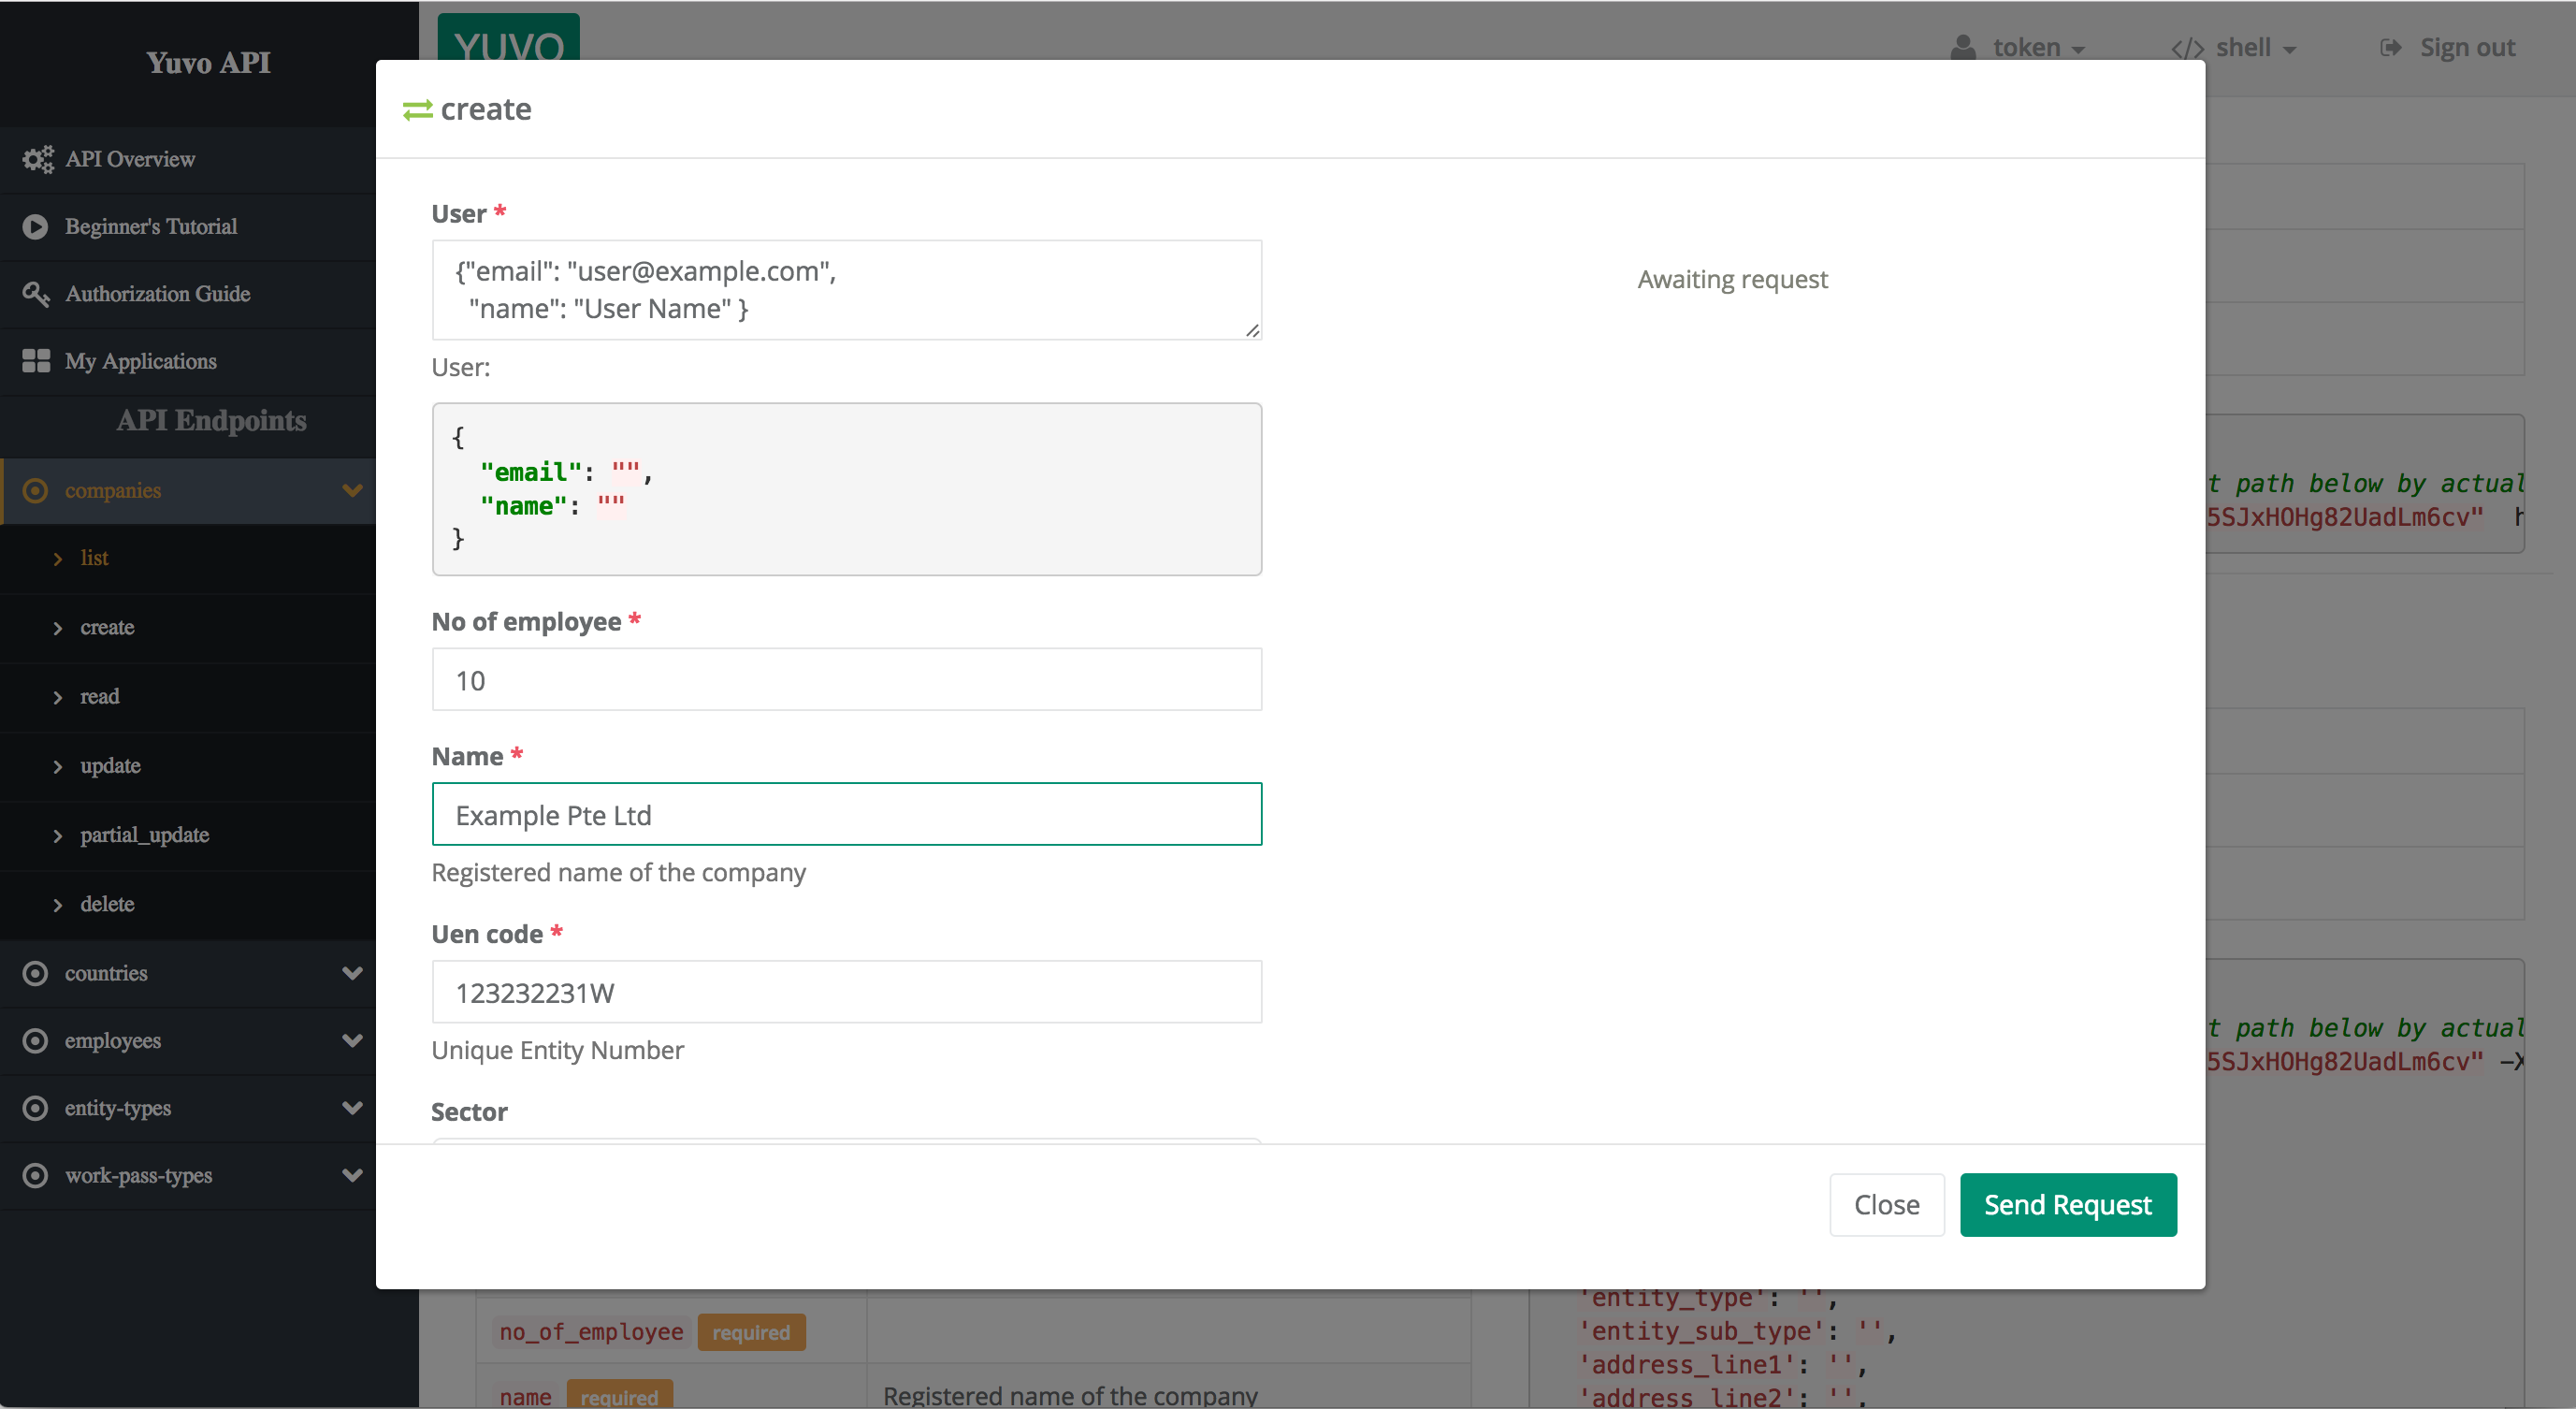
Browse the documentation and Click on "Interact" button for any endpoint.
First step could be to create a company for example: